- Home
- Installation Instructions for the Banjo Bolt Snubber BBS010
Installation Instructions for the Banjo Bolt Snubber BBS010
Installation Instructions for the Banjo Bolt Snubber BBS010
Run the engine to full operating temperature. You may also plug in your block heater during the snubber and gauge installation. This will make it easier to start the engine later, after priming the fuel system.
The banjo bolt that you will replace with the 12MM gauge snubber is located on the injection pump or fuel filter canister. Some engines may have a manifold or test port that you can tap into. DO NOT USE A PORT ON THE COMMON RAIL OR THE HIGH PRESSURE SIDE OF THE INJECTION SYSTEM. SERIOUS INJURY AND DAMAGE WILL RESULT!
Clean around the banjo fitting with a clean shop towel and carefully blow of any loose particles with compressed air. Wear safety glasses.
MSDS reports state that diesel fuel and biodiesel are skin irritants. Fuel will leak from the injection pump when the banjo bolt is removed. Wear rubber gloves to protect your hands.
Place a drip pan under the banjo bolt, as a cup or two of fuel will leak out of the pump or fuel lines. Loosen and remove the banjo bolt with the appropriate wrench. Make sure to remove the old seal on the back side of banjo fitting. Most times it will fall to the ground when the banjo bolt is removed. Discard old seals. Save the banjo bolt in the event you want to sell your vehicle at a later date.
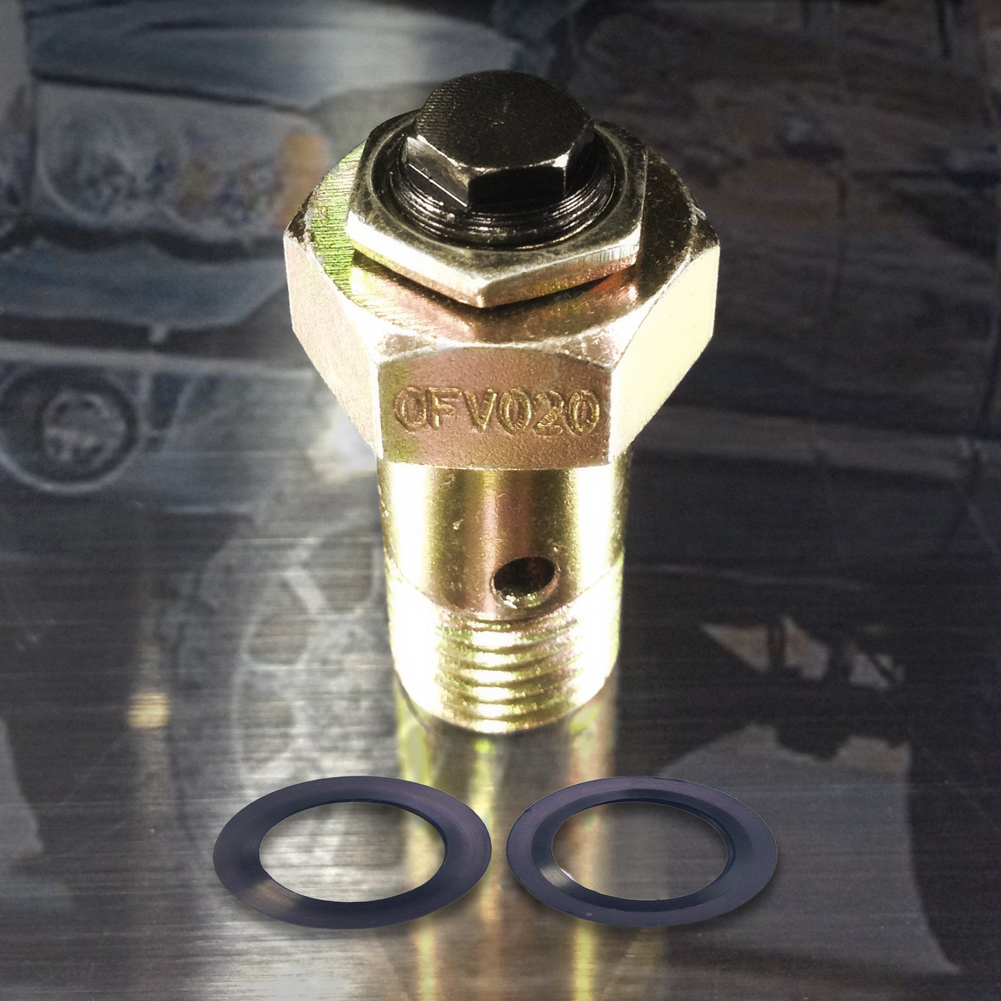
Cardinal rule of hydraulics. Never install a seal dry. Coat the new BS12MM seals with hydraulic or engine oil. The oil will make a better seal and help protect the rubber coated seals from tearing. Install one seal on the BBS010 snubber and hold the other seal on the back side of banjo fitting as you screw the snubber into the injection pump, test port or fuel filter housing.
Torque the snubber to 19 Ft. lbs. Too much torque can strip the threads in the injection pump or fuel filter canister. Do not over tighten.
For testing, run a 24” to 30” length of ¼” fuel rated hose from the snubber to a gauge. If you choose to supply your own testing gauge, make sure the gauge has an orifice in the base of the NPT threads. This step is for testing purposes ONLY. It is not a permanent installation. When testing or adjusting fuel pressure is done, remove hose and gauge. Plug snubber with 1/8” pipe plug.(provided) Use teflon tape on threads to prevent leaks.
Permanent installations to an in-cab gauge require a different approach. Do not run a hose from the snubber to the gauge. It is a fire hazard and is illegal with racing organizations. Run a #4 SS braided hose from the snubber to a Tork Tek® fuel isolator PN R7797, and one hose to the gauge. Follow the instructions carefully, otherwise you will get inaccurate pressure readings.
The fuel system must be primed before starting the engine. On trucks equipped with factory electric fuel pumps, simply turn the key on and off several times till you see a reading on the fuel pressure gauge. Trucks that have an Air Dog or FASS, turn the key on to prime fuel system. You may have to crack open a fitting to bleed the air out of the system. A trick that works very well, is to use the test hose and no gauge(step 8). Run the pump till you see a solid stream of fuel flow from the hose. Install gauge after priming or remove hose and plug snubber port.
Start engine and check for fuel leaks. Engine may stumble or run rough for several seconds. This is normal as the air is worked out of the lines. Note step number one.
Installation is complete. Save instructions for future reference.
 Loading... Please wait...


